Azure Files Migration While Preserving UNC Paths: The Ultimate Guide
Migrating file shares to Azure Files is the easy part. Keeping your UNC paths intact so nothing breaks is where it gets interesting.
Cloud Stack
Apr 30, 2026 · 15 min read
Migrating to Azure Files but want to keep your existing share paths intact? You are not alone. Preserving share paths is one of the most overlooked parts of a file migration, and getting it wrong means a wave of support tickets the morning after cutover.
There are plenty of good reasons to keep your paths as they are. Mapped drives embedded in login scripts and Group Policy would all need updating. Line of business applications that have share paths hardcoded in config files or databases can be painful to update. Users who have bookmarked network locations or saved paths in documents would lose access without warning. In regulated environments, documented UNC paths may even be referenced in audit trails or compliance documentation. The bottom line is that changing share paths is risky, time consuming, and often unnecessary if you plan the migration correctly.
DFS-N Root Consolidation
DFS Namespace Root Consolidation lets you completely preserve existing share paths when migrating file shares to Azure Files. Users and applications keep connecting to the same UNC paths they always have, with no client-side changes required.
The idea is to build a DFS Namespace cluster on Azure VMs, then use root consolidation to make the DFS cluster respond to the old file server's name. Users and applications connecting to \\oldfileserver\sharename get transparently redirected to the Azure file share.
\\oldfileserver hosts \finance, \hr, and \projects, all three need to be migrated to Azure Files and added as DFS folder targets before you update DNS. You cannot migrate shares one at a time and leave others on the old server. Plan your migration waves accordingly.Because DFS root consolidation is only supported on standalone DFS Namespaces, you'll need a Windows Server Failover Cluster built on two Azure VMs to back it. That means shared managed disks, a Windows cluster, an Azure Load Balancer, and some SPN manipulation. It's the right approach for environments where you can't afford any client-side changes.
Architecture Overview
The end state: two Azure VMs running Windows Server form a failover cluster. The cluster hosts a DFS Namespace role. The namespace uses root consolidation to accept connections using the old file server's name. An Azure Load Balancer handles the static IP for the cluster client access point, since Azure doesn't support Gratuitous ARP. DNS is updated to point the old server name at the load balancer's frontend IP. SPNs are moved from the old computer object to the DFS cluster. Azure Files sits at the other end as the actual storage target.
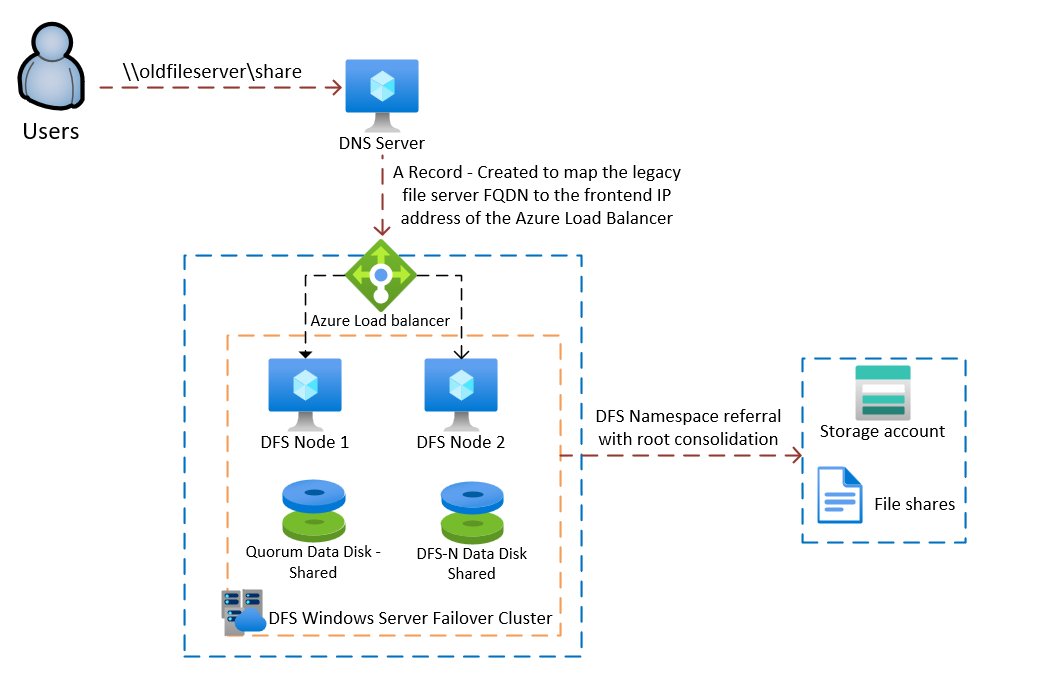
DFS Namespace root consolidation architecture. Users connect to the old UNC path, DNS resolves to the Azure Load Balancer, which fronts the two-node DFS cluster, which refers traffic to Azure Files. · click to zoom
Known Issue: WebDAV and the WebClient Service
Before you build anything, there is a known issue with DFS root consolidation and a legacy Windows service called WebDAV, listed in Windows Services as WebClient.
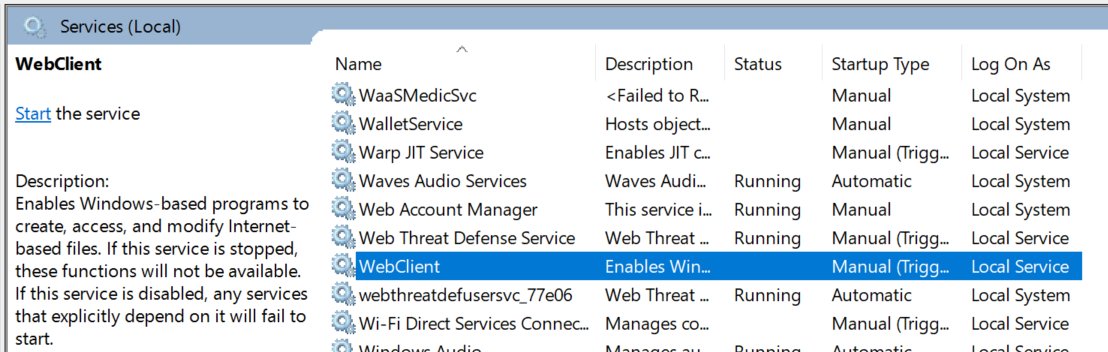
The WebClient service in Windows Services. When set to anything other than Disabled, it can cause significant performance issues with DFS root consolidation. · click to zoom
When the WebClient service is set to anything other than Disabled, some users experience very slow file and share open performance when connecting through DFS root consolidation. This is a well-documented interaction between the WebDAV protocol and DFS namespaces. Windows attempts a WebDAV negotiation before falling back to SMB, adding significant latency to every file open operation for affected users.
WebDAV itself is being phased out by most providers in favour of more secure and efficient alternatives. It is generally only used by legacy file sharing applications, and Microsoft has deprecated native WebDAV support. The WebClient service, which provides WebDAV support in Windows, is no longer enabled by default in modern Windows versions. If you find it running in your environment, it is likely a legacy dependency worth reviewing regardless of this migration.
Step-by-Step: Building the DFS Cluster
Create the Quorum Shared Managed Disk
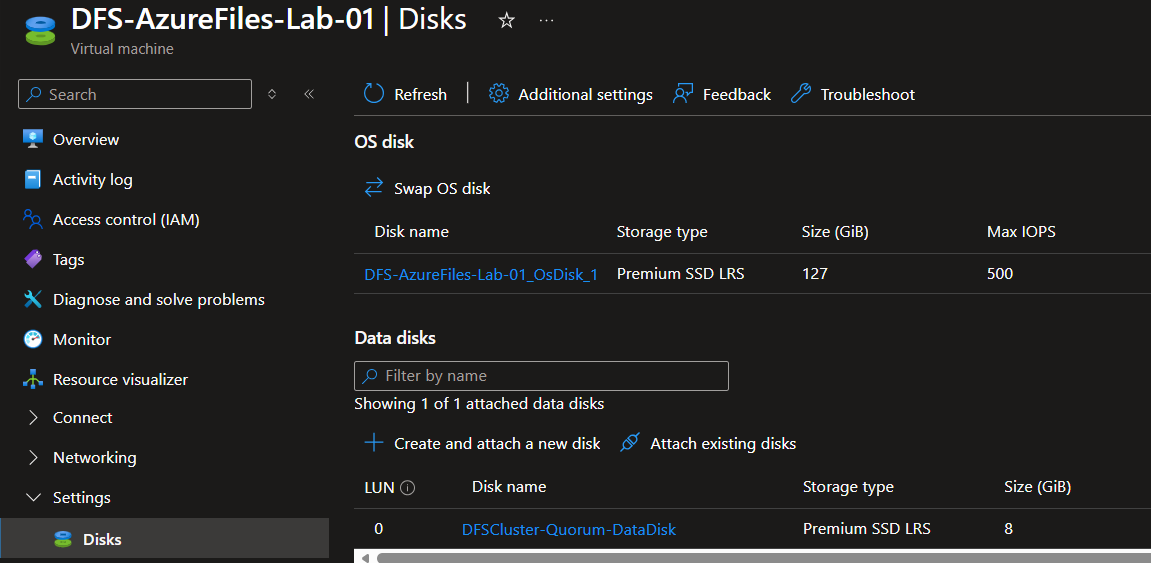
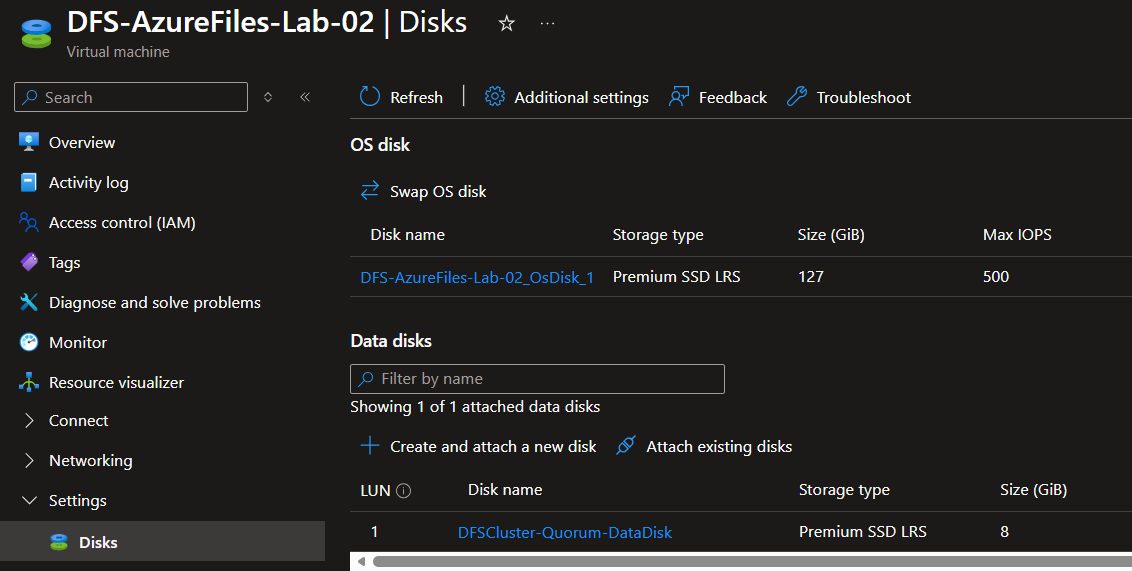
You'll need two VMs with no data disks to start. Create the first shared managed disk (the cluster quorum disk) with these parameters:
Same region as your VMs. CreateOption as Empty. MaxSharesCount as 2. DiskSizeGB as 8GB. You only need it for quorum.
Creating the quorum shared managed disk · click to zoom
Attaching the quorum disk to both VMs · click to zoom
Quorum disk attached to both VMs · click to zoom
On both servers, open Disk Management, initialise the disk (GPT), partition, format, and assign drive letter Q for Quorum. The cluster will handle disk ownership once it's set up.

Initialising and formatting the quorum disk. Assign drive letter Q on both servers. · click to zoom
Install Failover Clustering
On both DFS servers, open PowerShell as Administrator and run:
Install-WindowsFeature -Name Failover-Clustering -IncludeManagementTools
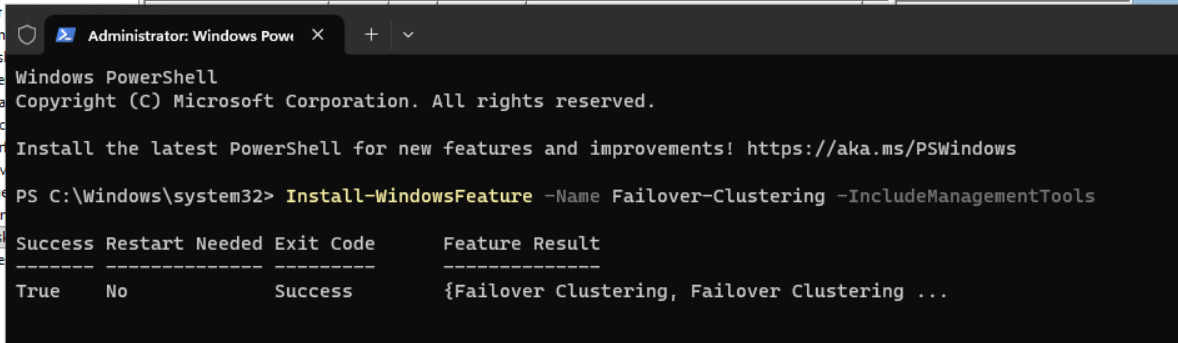
Installing the Failover Clustering feature on both servers · click to zoom
Create the Windows Cluster
Once the feature is installed, open Administrative Tools and then Failover Cluster Manager on your first DFS server.
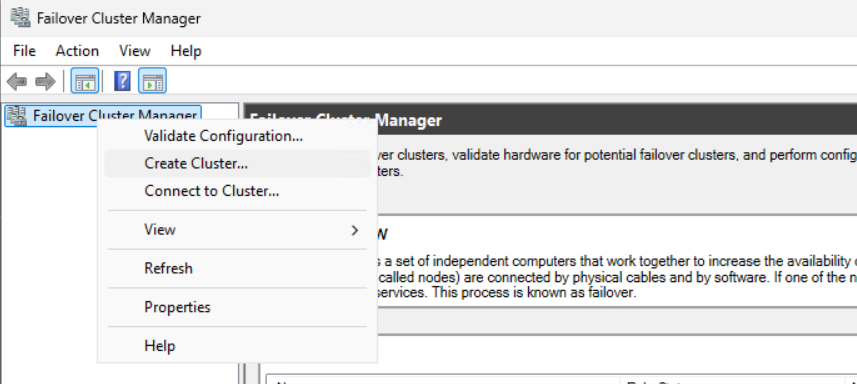
Failover Cluster Manager · click to zoom
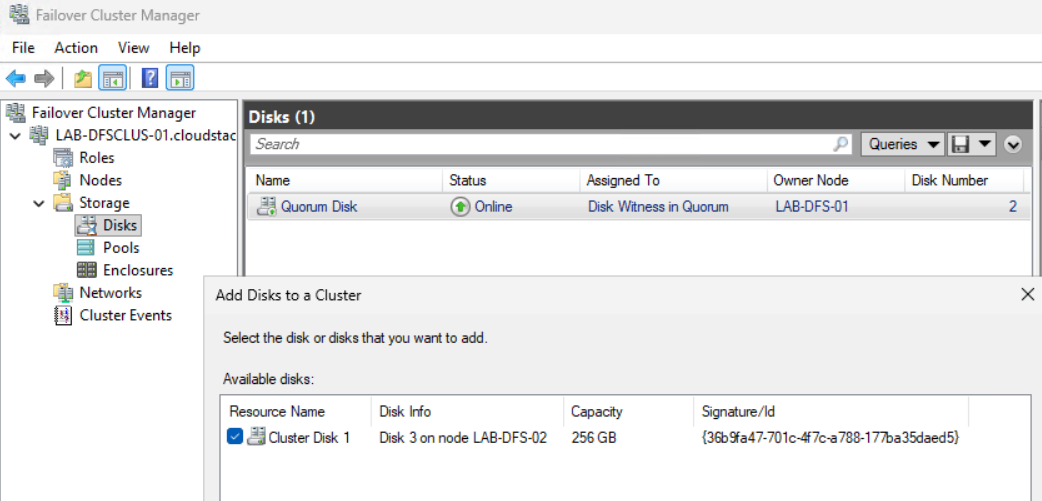
Add both DFS VMs to the cluster.
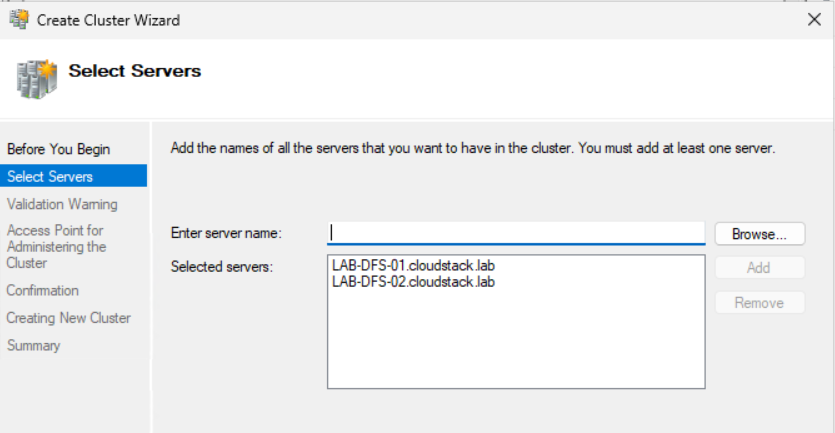
Adding both DFS VMs · click to zoom
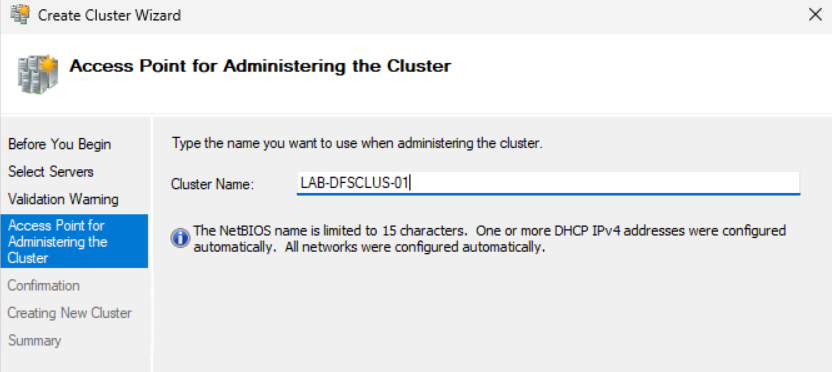
Run through Cluster Validation and make sure there are no significant warnings or errors. Give your cluster a name of 15 characters or less.
Cluster validation. Check for any significant errors before proceeding. · click to zoom
Create the cluster and verify it was created successfully.
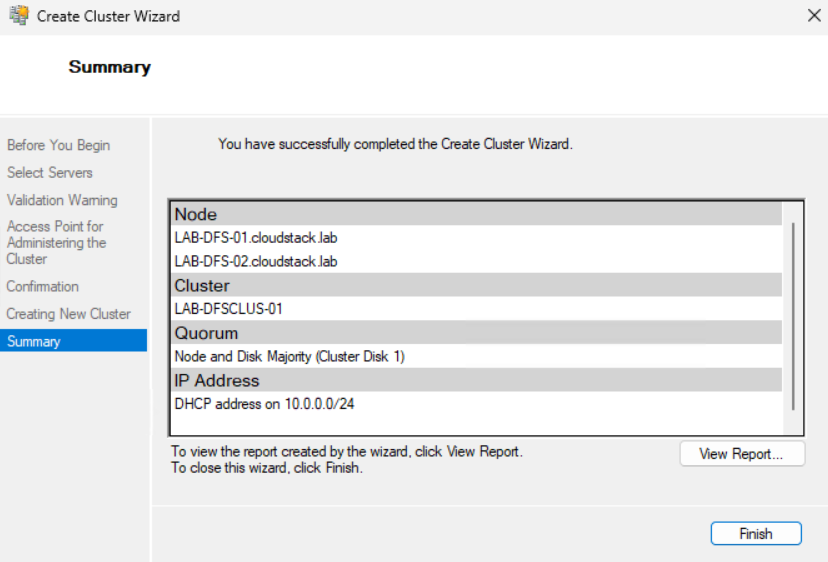
Cluster created successfully · click to zoom
Ensure both nodes are up and available.
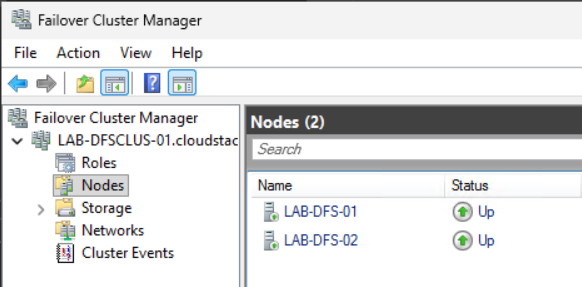
Both nodes up and available · click to zoom
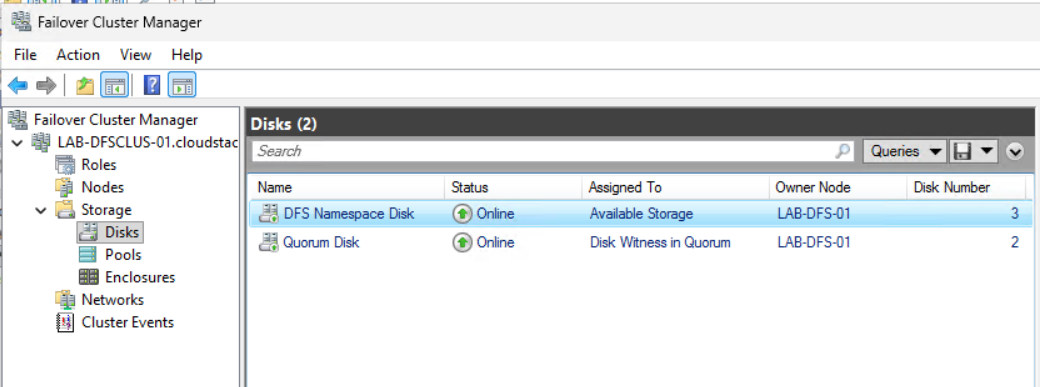
Navigate to Storage and then Disks. Double-click the disk and rename it to Quorum Disk.
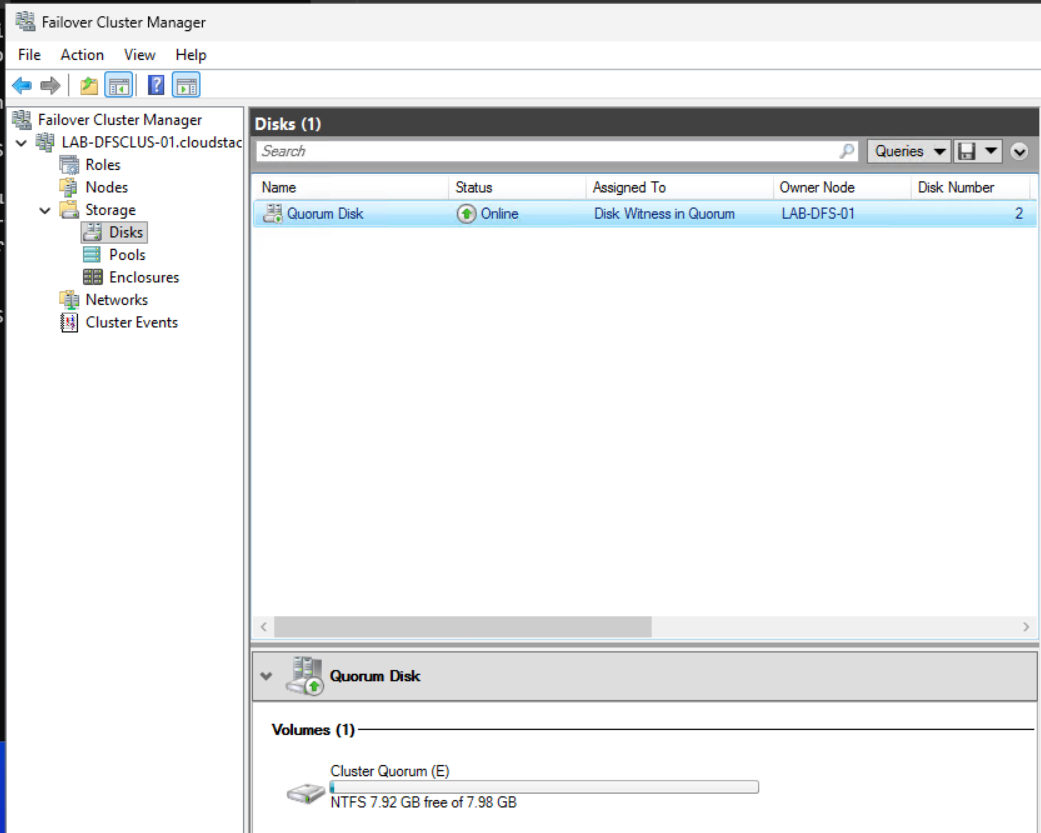
Renaming the disk to Quorum Disk · click to zoom
Create the DFS Data Disk
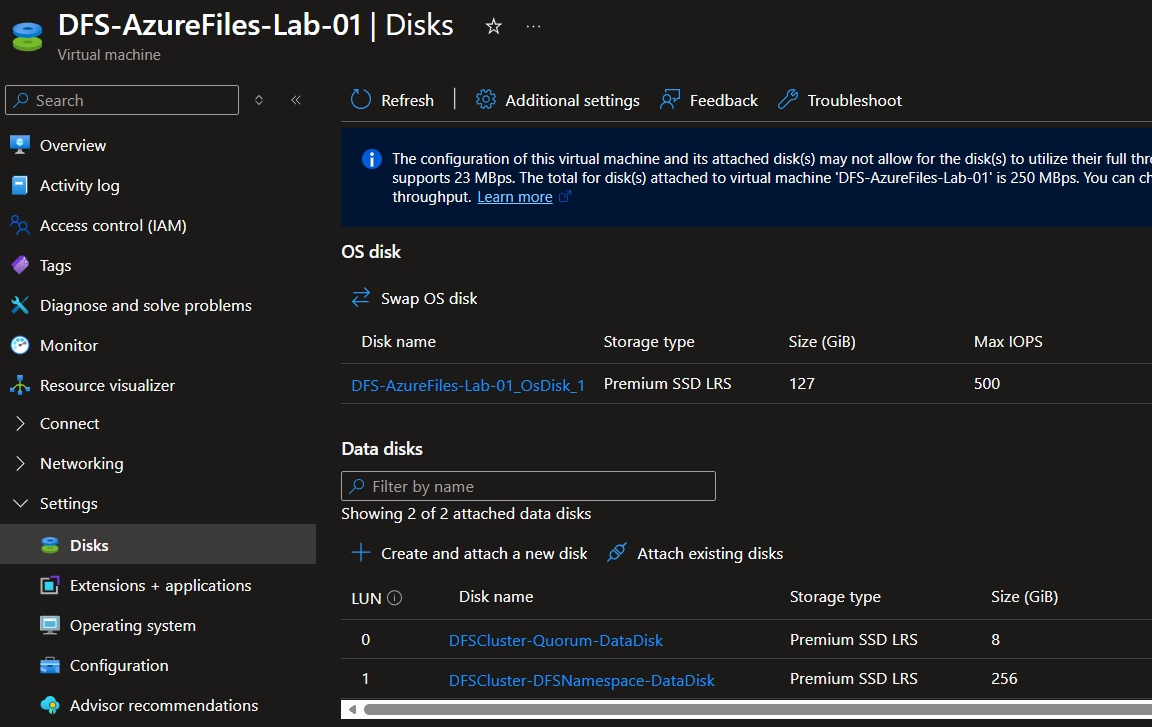
Now create your second shared managed disk, the DFS Namespace data disk. Create this as a Premium SSD with these parameters:
Same region as your VMs. CreateOption as Empty. MaxSharesCount as 2. DiskSizeGB as 256GB (P15).

Creating the DFS Namespace data disk, Premium SSD P15 · click to zoom
Attach the DFS data disk to both VMs the same way you did for the quorum disk.
Attaching the DFS data disk to both VMs · click to zoom
On both servers, open Disk Management, initialise, partition, format, and assign drive letter N for DFS Namespace.
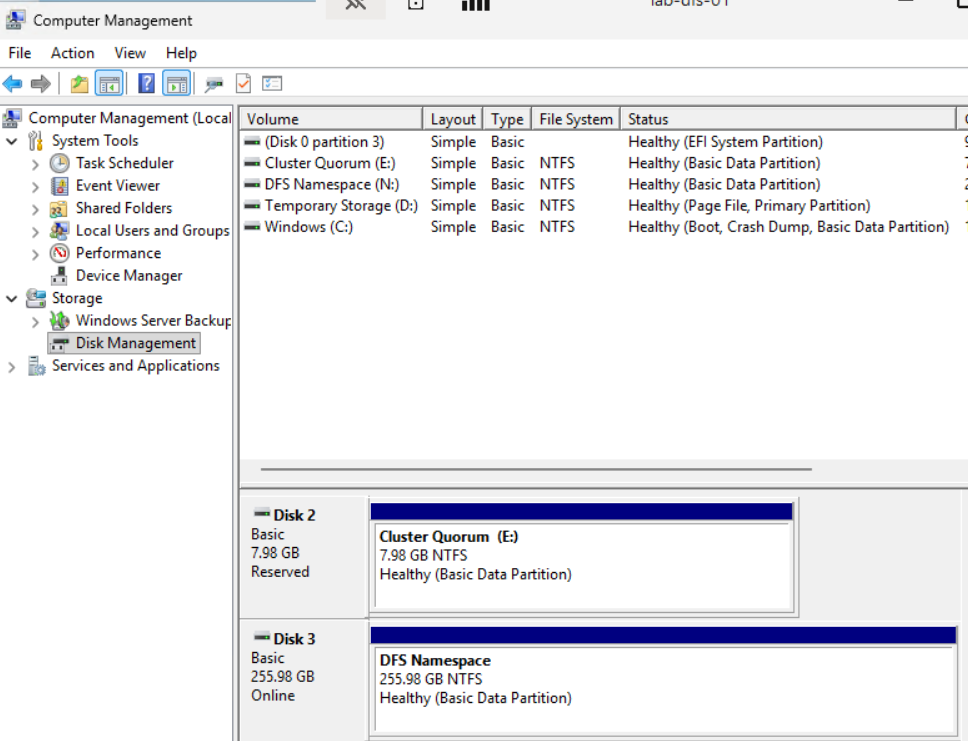
DFS Namespace disk initialised as drive N on both servers · click to zoom
Install the DFS Role
On both DFS servers, open PowerShell as Administrator and run:
Install-WindowsFeature "FS-DFS-Namespace", "RSAT-DFS-Mgmt-Con"
Once installed, go to one of your cluster nodes, open Cluster Disks, and choose to add the new DFS data disk.
Adding the DFS data disk to the cluster · click to zoom
Double-click the new disk and give it a name.
Renaming the DFS data disk · click to zoom
Configure the DFS Role on the Cluster
In Failover Cluster Manager, right-click Roles and choose Configure Role.
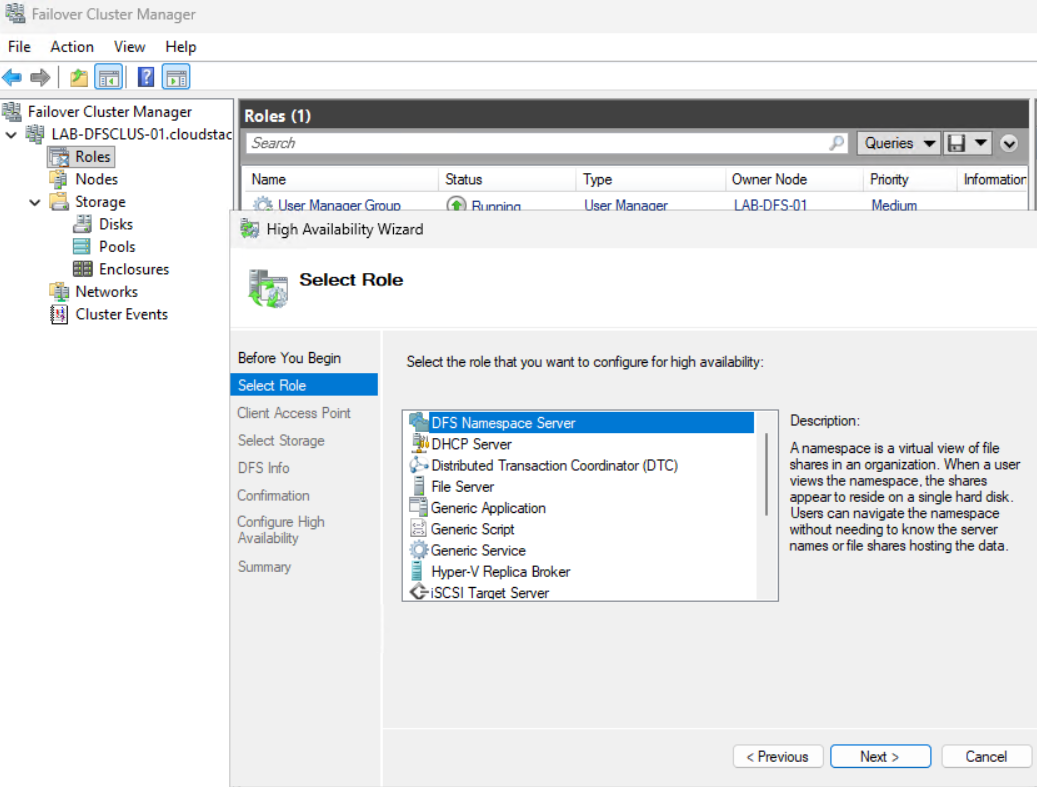
Right-click Roles and choose Configure Role · click to zoom
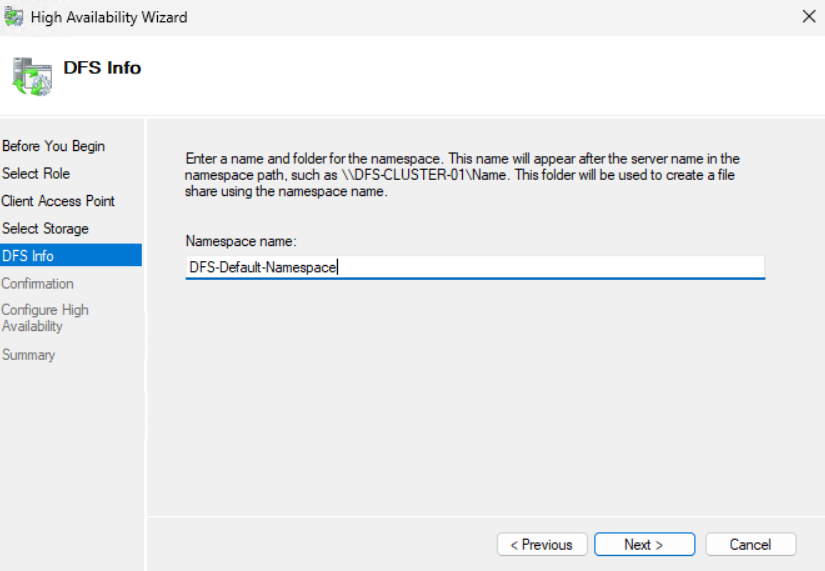
Give your DFS Client Access Point a name of 15 characters or less. This becomes the UNC name users connect to and the hostname used by DNS.
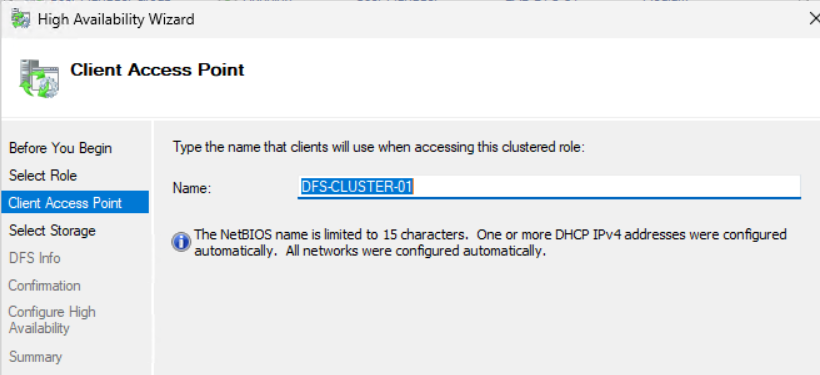
Setting the DFS Client Access Point name. 15 characters or less. · click to zoom
Select the new cluster disk you made available to the cluster.
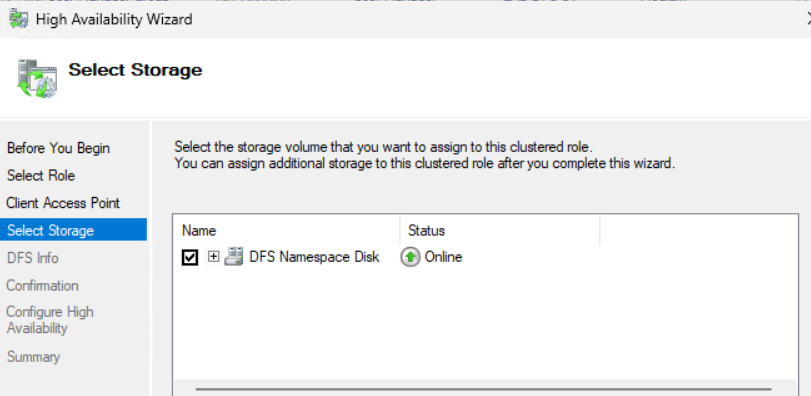
Selecting the DFS data disk for the role · click to zoom
Create your first namespace. Don't worry about the name, you'll delete it later. It's just required to complete the role setup.
Creating a placeholder namespace. This gets deleted later. · click to zoom
Complete the installation. The role will show as failed. That's expected. Two things still need sorting: a static IP and an Azure Load Balancer.
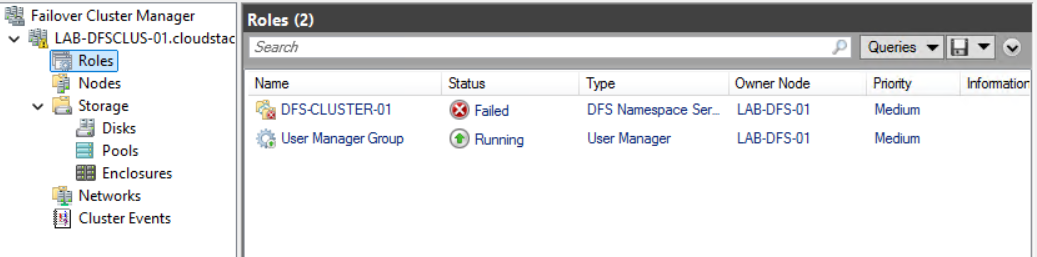
DFS role in failed state. Static IP and Load Balancer still to configure. · click to zoom
Assign a Static IP to the DFS Role
Open the DFS client access point in Failover Cluster Manager, select Resources, then select the IP Address.
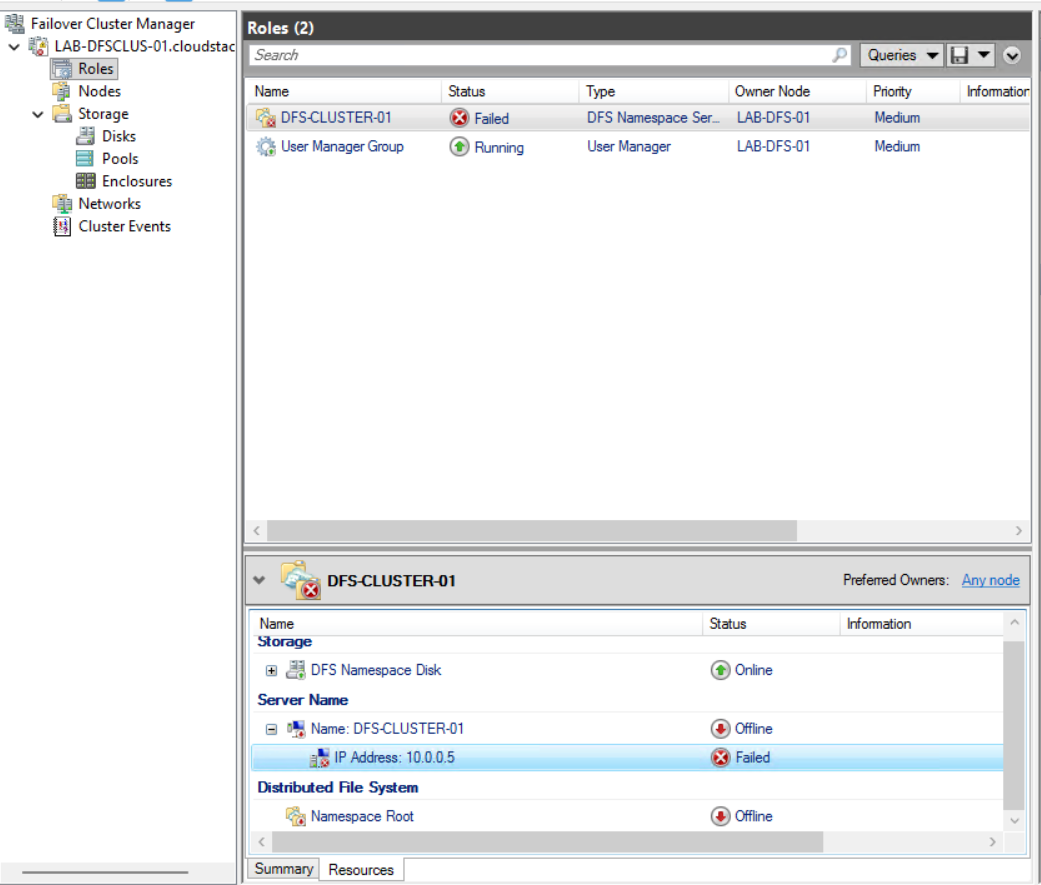
Opening the DFS Client Access Point IP Address resource · click to zoom
Double-click and assign a static IP that's available in your Azure subnet. This same IP will be the frontend of your Azure Load Balancer.
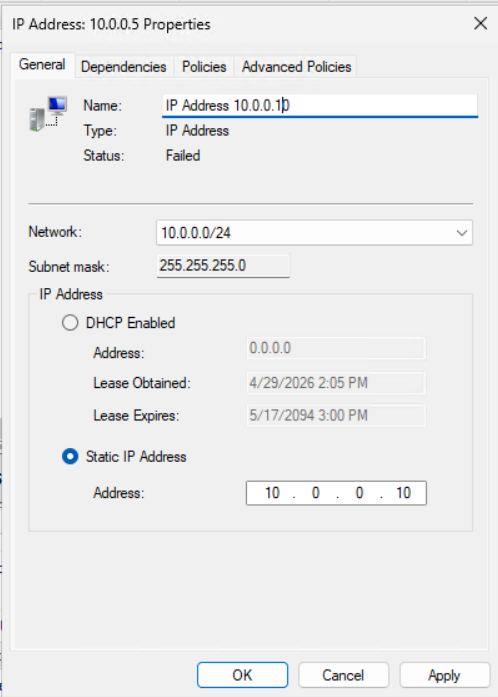
Assigning the static IP. Note this down, you'll need it for the Load Balancer. · click to zoom
Once the static IP is configured, start the DFS Role.

Starting the DFS Role · click to zoom
The DFS Role should now be running with all resources showing as Online.
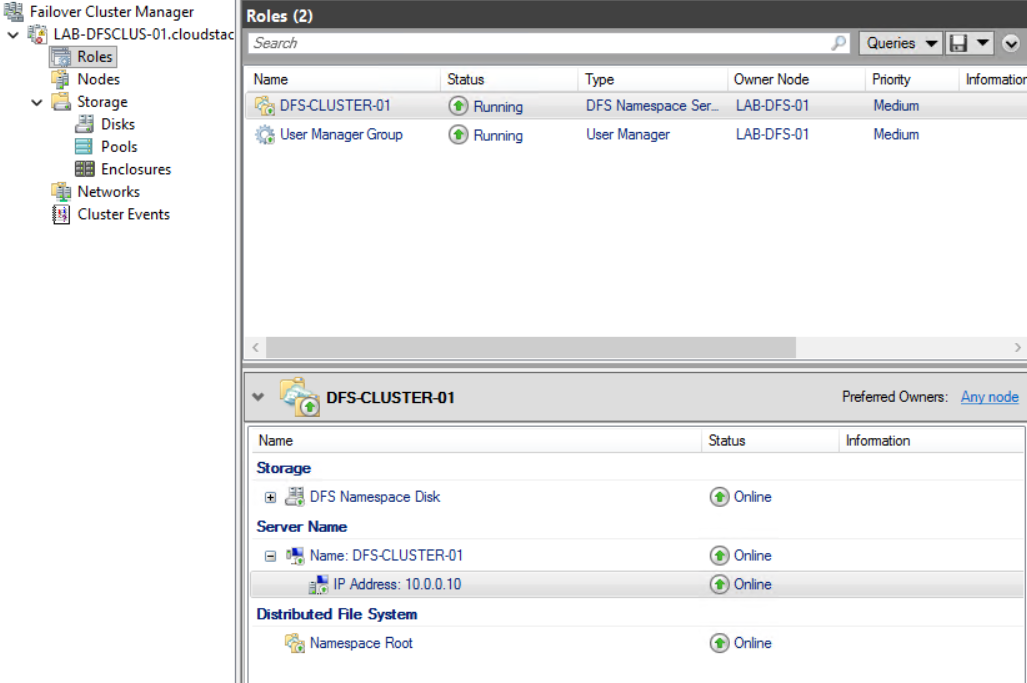
DFS Role online, all resources green · click to zoom
Check DNS. You should see the appropriate records have been created automatically.
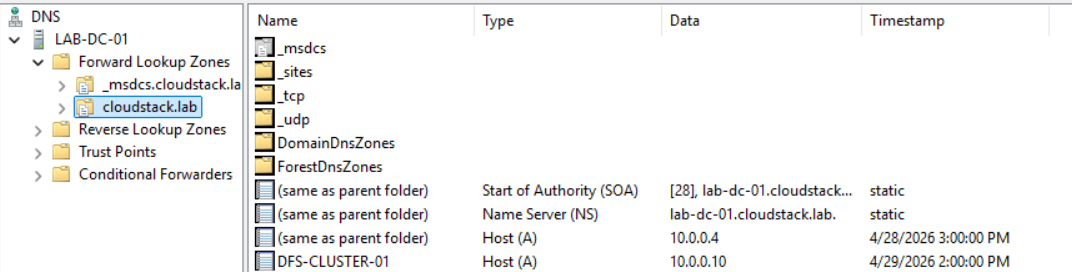
DNS records created automatically for the DFS client access point · click to zoom
Set Up the Azure Load Balancer
Create a Standard Internal Load Balancer in the same Azure region as your DFS cluster.
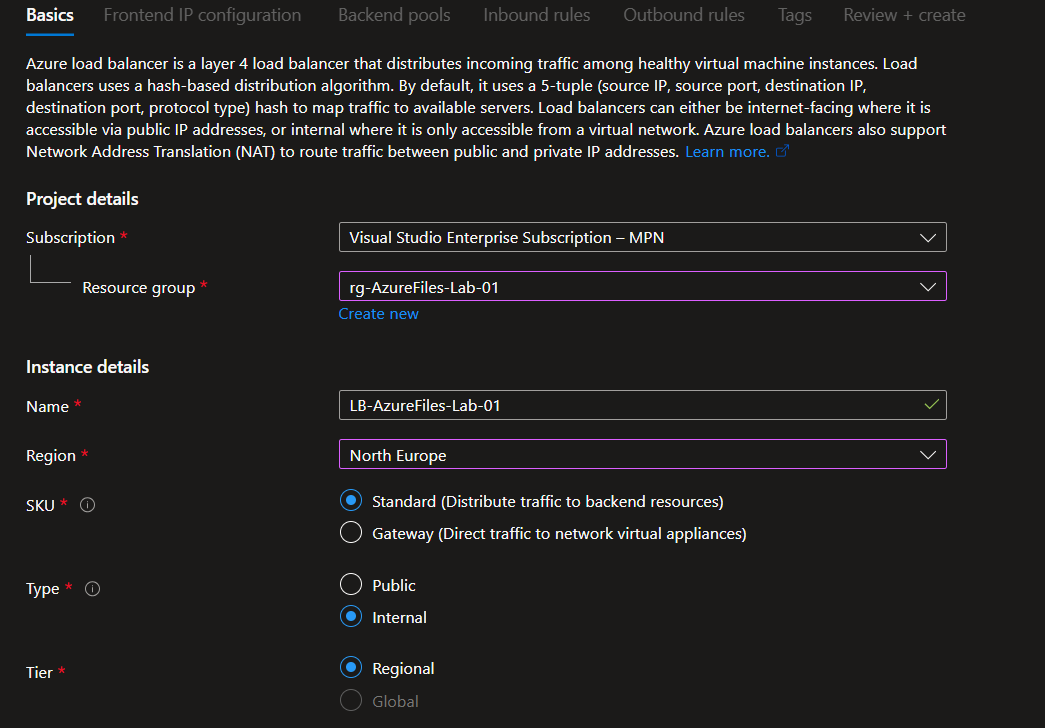
Creating a Standard Internal Load Balancer · click to zoom
Frontend IP: Use the same static IP you configured on the DFS client access point.

Frontend IP matching the DFS cluster static IP · click to zoom
Backend pool: Add both DFS cluster nodes.
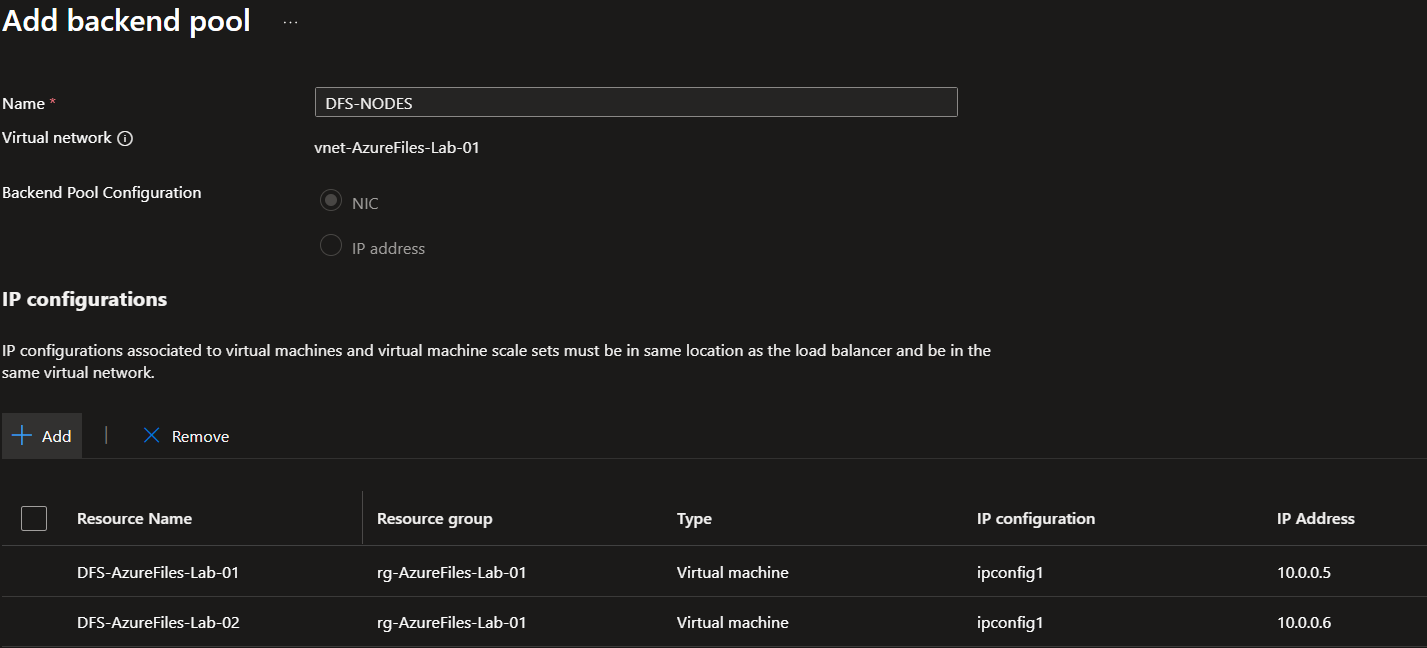
Backend pool, both DFS cluster nodes added · click to zoom
Load balancing rule: Use HA Ports. Health probe: TCP port 135 (Remote Procedure Call).
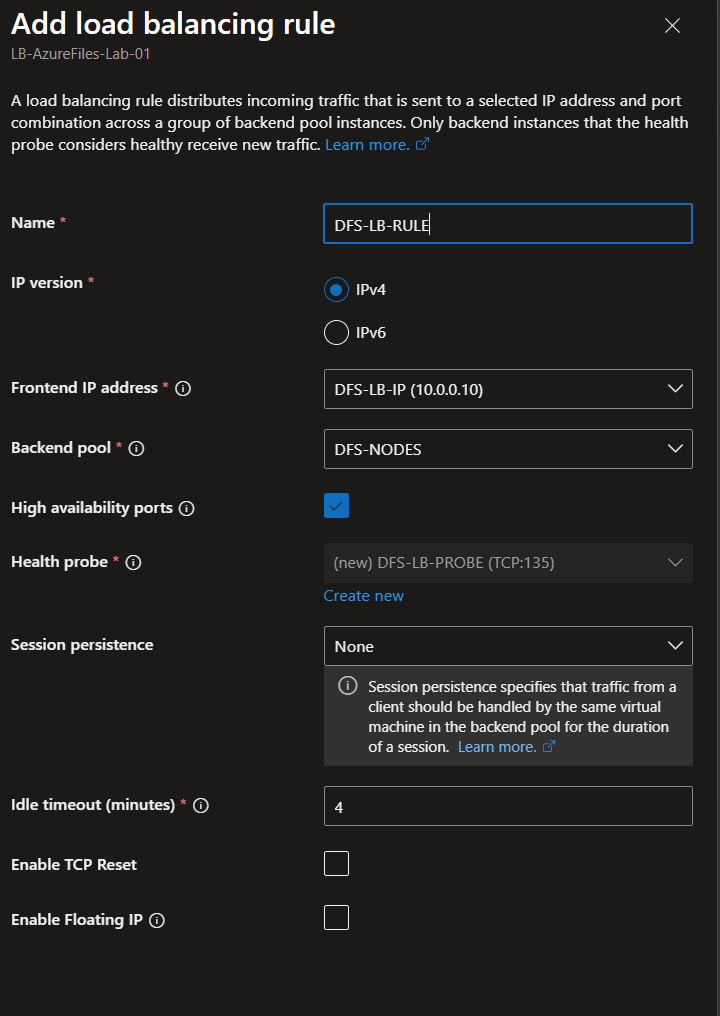
HA Ports load balancing rule with TCP 135 health probe · click to zoom
Once the Load Balancer is created, navigate to Insights and verify both backend servers show as healthy.
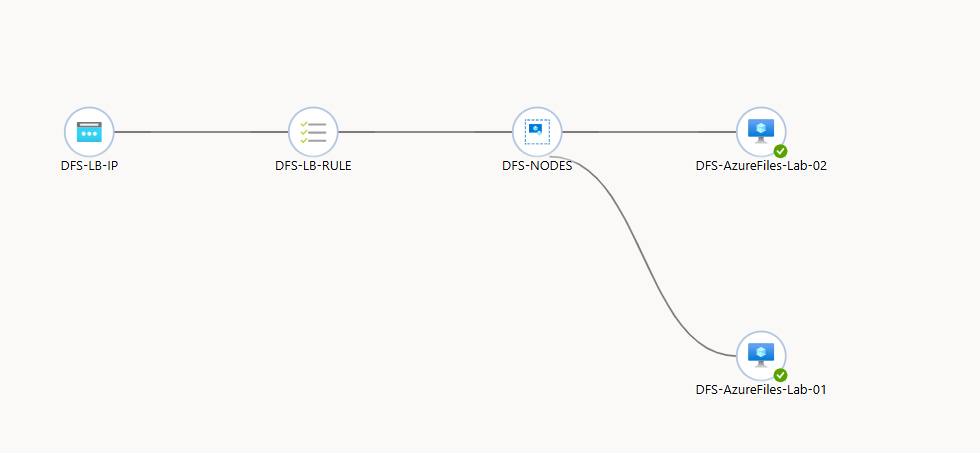
Both DFS cluster nodes showing as healthy in Load Balancer Insights · click to zoom
Now go back and try browsing to your DFS cluster UNC path. It should now work, empty for now but accessible.
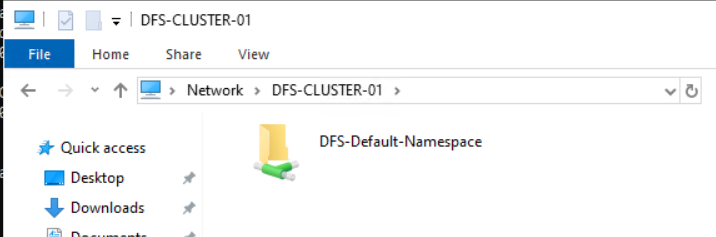
DFS cluster UNC path now accessible · click to zoom
Configuring DFS Namespace Root Consolidation
With the cluster up and accessible, you can now configure root consolidation to make it respond to the old file server's name.
Enable the Registry Keys for Root Consolidation
On each DFS cluster node, run the following PowerShell commands as Administrator, then reboot each server one at a time. Monitor Failover Cluster Manager to make sure each node is back and operational before moving to the next.
New-Item -Type Registry -Path "HKLM:SYSTEM\CurrentControlSet\Services\Dfs"
New-Item -Type Registry -Path "HKLM:SYSTEM\CurrentControlSet\Services\Dfs\Parameters"
New-Item -Type Registry -Path "HKLM:SYSTEM\CurrentControlSet\Services\Dfs\Parameters\Replicated"
Set-ItemProperty -Path "HKLM:SYSTEM\CurrentControlSet\Services\Dfs\Parameters\Replicated" -Name "ServerConsolidationRetry" -Value 1
Create the Root Consolidation Namespace
On one of the DFS cluster nodes, open the DFS Management Console and create a new Namespace. Select your DFS cluster's Client Access Point as the namespace server.
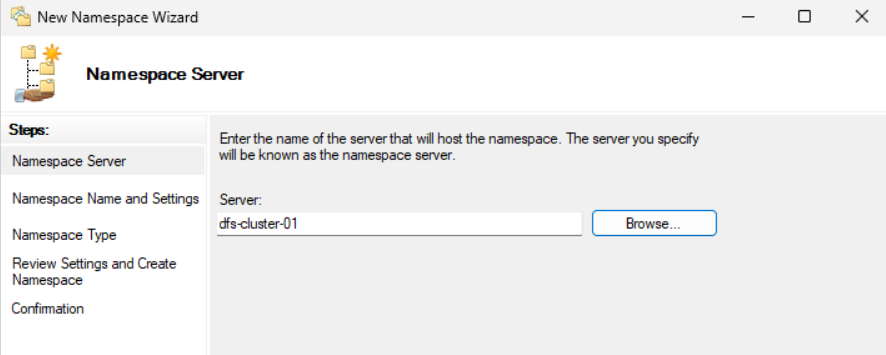
Creating a new namespace. Select the DFS cluster client access point as the server. · click to zoom
The namespace name must be the name of your old file server with a # prefix. The hash tells DFS this namespace is using root consolidation. For example if your old server share path was \\oldfileserver\share, the namespace name should be #oldfileserver.
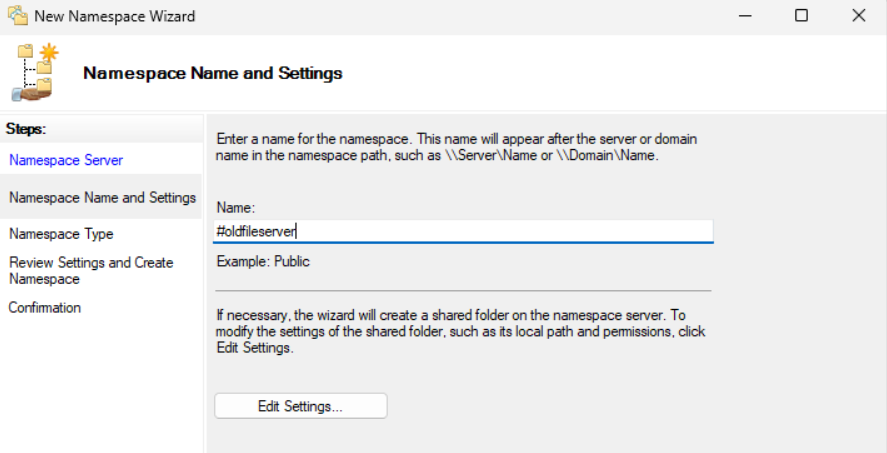
Namespace name must be the old server name prefixed with #. This is what triggers root consolidation. · click to zoom
Create the namespace and validate it has been created successfully.

Root consolidation namespace created · click to zoom
Add the Azure File Share as a Folder Target
In the DFS Management Console, add a new folder to your #oldfileserver namespace. The folder target will be the Azure file share in your storage account. Make sure DNS is working so you can resolve your storage account via the private DNS zone before testing.
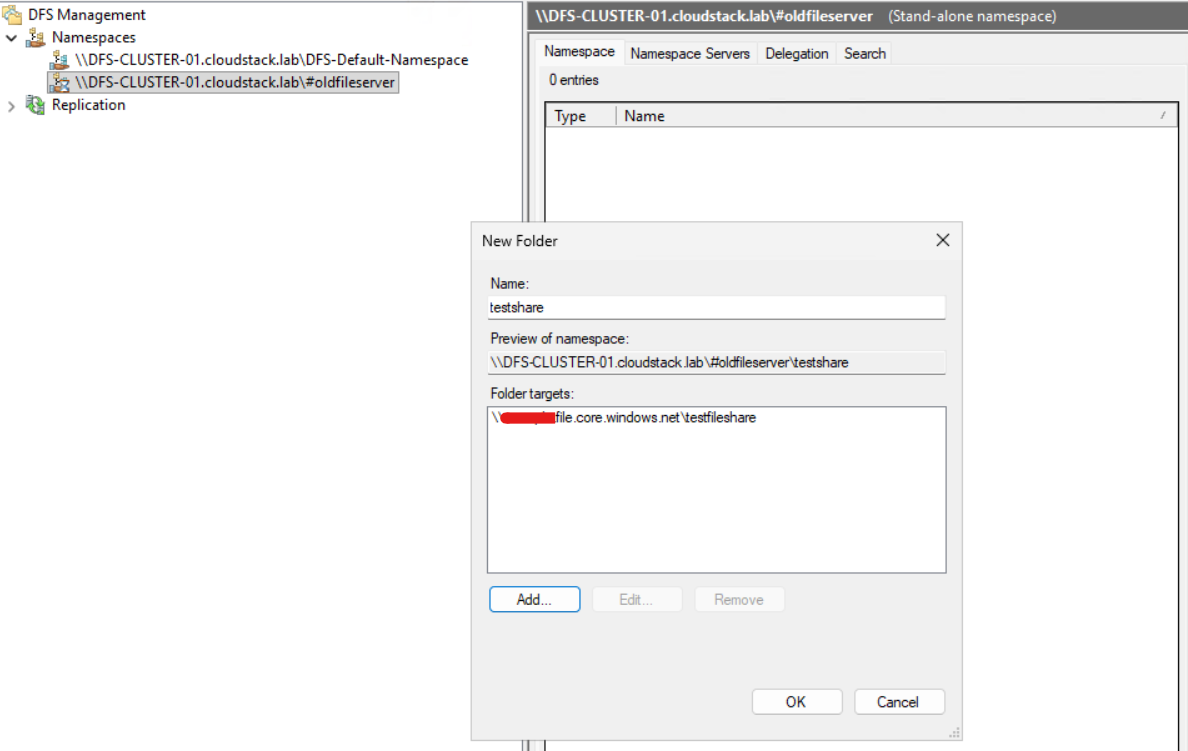
Adding the Azure Files share as a folder target under the root consolidation namespace · click to zoom
Update DNS and Move the SPNs
In your DNS Management Console on your Domain Controller, delete the old file server's DNS record and create a new A Record pointing to the frontend IP of your Azure Load Balancer.
setspn -l oldfileserver
Kerberos ticket caching can also catch you out. Even after the DNS and SPN changes are in place, end user machines may still have stale Kerberos tickets cached. If users cannot connect after the cutover, run the following to clear the cache and force a fresh ticket:
klist purge
Then using a Domain Administrator account, run the following in an Administrator Command Prompt to remove the SPNs from the old file server. Update the commands to reflect your actual server name and FQDN.
setspn -d HOST/oldfileserver oldfileserver
setspn -d HOST/oldfileserver.yourdomain.com oldfileserver
Add those SPNs to the DFS cluster client access point:
setspn -S over setspn -A. The -S flag checks for existing duplicate SPNs before adding, preventing broken authentication. Never use -A as it will add the SPN regardless of duplicates, which can cause Kerberos failures that are hard to diagnose.setspn -s HOST/oldfileserver DFS-CLUSTER-01 setspn -s HOST/oldfileserver.yourdomain.com DFS-CLUSTER-01
Verify the SPNs were added correctly:
setspn -l DFS-CLUSTER-01
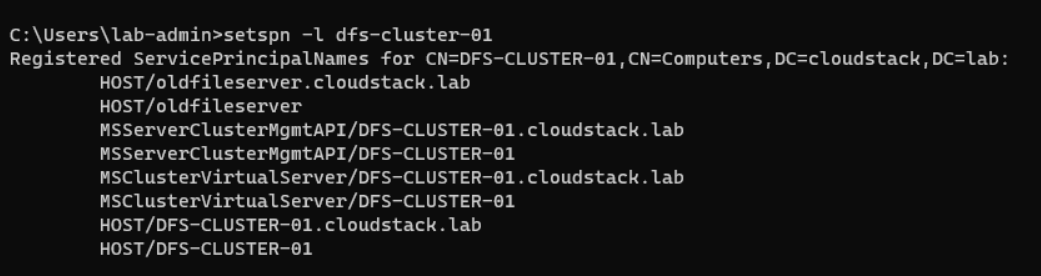
SPNs from the old file server now correctly registered on the DFS cluster · click to zoom
Test the UNC Path
Browse to \\oldfileserver\sharename. You should see your Azure Files data served transparently through the DFS cluster, with no changes required on the client side.
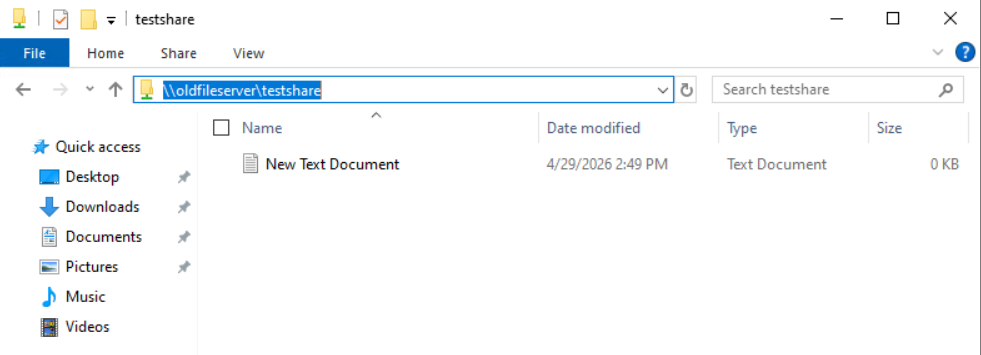
The old UNC path now resolves to Azure Files via DFS root consolidation · click to zoom
DFS root consolidation is the right approach when you need to preserve old UNC paths completely, without touching clients, scripts, or application configs. It's more infrastructure to manage than a simple DNS alias, but once it's in place it's invisible to end users.
The key things to get right are the load balancer (Azure's lack of Gratuitous ARP will bite you if you skip it), the registry keys for root consolidation on both nodes, the # prefix on your namespace name, and the SPN migration. Get those four things right and the rest follows.